Fitting a fibreglass roof has become a popular choice in modern construction due to its numerous benefits. Fibreglass roofing, made from glass-reinforced plastic (GRP), offers a lightweight, durable, and waterproof solution that is ideal for flat and low-pitched roofs. For example, a fibreglass bay window roof also benefits from these qualities, offering a sleek, reliable option for homeowners. Its resistance to weather elements, such as UV rays and moisture, ensures a long-lasting finish that can withstand the test of time. However, the importance of proper installation cannot be overstated. Ensuring that the fibreglass layers are applied correctly is crucial for maximizing the roof’s longevity and durability. This article will guide you through the essential steps and considerations for successfully fitting a fibreglass roof. Fitting a fibreglass roof requires planning, proper materials, and dry weather; check forecasts and keep resin or topcoat below 35°C.
Fitting a Fibreglass Roof and What is Fibreglass Roofing
Fitting a fibreglass roof involves utilizing a material known as Glass Reinforced Plastic (GRP), which is composed of a combination of glass fibers and resin. This composite material is renowned for its strength, flexibility, and resilience, making it an ideal choice for roofing applications, particularly in flat and low-pitched structures. The process of fitting fibreglass roof requires careful planning and execution to ensure that the final product is both aesthetically pleasing and functionally sound.
What is Fibreglass Roofing?
Fibreglass roofing is a durable, waterproof, and versatile roofing solution commonly used for flat and low-pitched roofs. Made from reinforced glass fibres embedded in resin, it creates a strong, seamless surface that is resistant to weather, impact, and corrosion. This roofing method is widely used for domestic, commercial, and industrial buildings due to its long lifespan and low maintenance requirements. Below, we explore fibreglass roofing from multiple aspects, including its composition, benefits, installation process, and common applications.
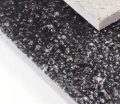
Composition and Structure
Fibreglass roofing consists of layers of fibreglass matting combined with liquid resin to form a solid, waterproof surface.
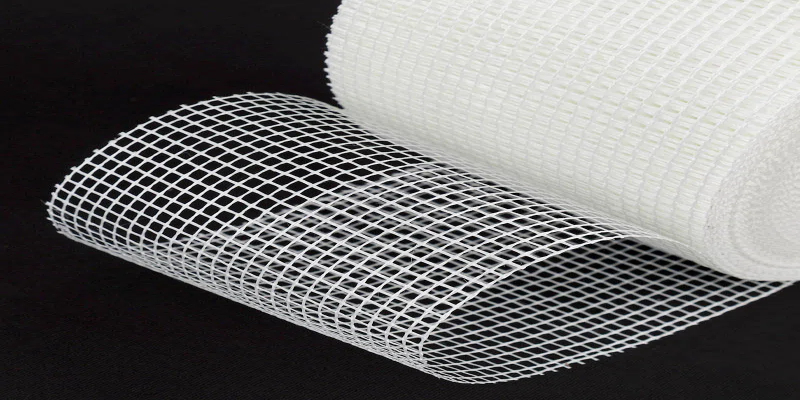
- Fibreglass Matting – Chopped strand mat (CSM) is the primary reinforcement, available in different thicknesses (e.g., 450g or 600g).
- Resin – Polyester or epoxy resin binds the fibreglass layers together and provides structural strength.
- Topcoat – A weatherproof and UV-resistant layer that protects the roof from environmental damage.
Common Applications
Fibreglass roofing is used across various sectors due to its versatility.
- Residential Buildings – Ideal for extensions, garages, and balconies.
- Commercial and Industrial Properties – Used in warehouses and factories due to its resilience.
- Outdoor Structures – Perfect for sheds, porches, and outbuildings needing weather protection.
Fibreglass roofing is a reliable, long-lasting solution for various roofing needs, offering strength, waterproofing, and minimal maintenance.
Fiberglass Roof Advantages
The advantages of fibreglass roofing are numerous and contribute to its growing popularity in the construction industry:
- Lightweight: Compared to traditional roofing materials, fibreglass is significantly lighter. This reduction in weight decreases the load on the underlying structure, which can be particularly beneficial for older buildings or those with less structural support. Additionally, the lightweight nature of fibreglass simplifies installation, allowing for quicker project turnaround times.
- Durability: Fibreglass roofing is highly resistant to a range of weather elements, including UV radiation, rain, and snow. Its robust composition ensures that it can withstand harsh environmental conditions without deteriorating. This durability translates to a long lifespan, often exceeding 20 years, and minimizes the need for frequent repairs or replacements.
- Waterproof: One of the standout features of fibreglass roofing is its seamless nature, which provides a waterproof barrier that protects against leaks and moisture ingress. This characteristic is especially crucial for flat roofs, where water pooling can lead to significant structural issues over time.
- Low Maintenance: Once installed, fibreglass roofs require minimal upkeep, making them a cost-effective solution over time. Unlike traditional roofing materials that may need regular inspections and maintenance, fibreglass simply needs occasional cleaning to remove debris, ensuring its continued performance and appearance.
- Aesthetic Versatility: Fibreglass roofing is available in various colors and finishes, allowing homeowners and builders to select a style that enhances the visual appeal of a building. This versatility means that fibreglass roofs can complement a wide range of architectural designs, from modern to traditional.
Understanding these fiberglass properties are essential when considering fitting a fibreglass roof, as they contribute to the overall performance and value of the roofing system. Proper installation techniques and quality materials are crucial to maximizing the benefits of fibreglass roofing, ensuring that it serves as a reliable and attractive option for years to come.
Ultimate Guide to Installing Your GRP Rooflight
Disadvantages of Fibreglass Roofing in Fitting a Fibreglass Roof
While fitting a fibreglass roof offers many benefits, it’s essential to consider the potential drawbacks associated with this material. Despite its durability, fibreglass roofing does come with some limitations that may affect its suitability for certain projects. Here are the key disadvantages:
Susceptibility to Damage
Fibreglass roofs can be prone to damage from sharp objects or heavy impacts. Although they are generally robust, falling debris or heavy foot traffic can cause cracks or punctures that compromise the roof’s integrity. For instance, if someone walks on the roof without appropriate precautions or if equipment is accidentally dropped, it can lead to serious damage, requiring repairs that might be costly and time-consuming.
Higher Initial Costs
The upfront costs of fibreglass roofing materials and installation are often higher than traditional roofing options like asphalt shingles or metal roofs. This initial investment can be a significant factor for homeowners or businesses working within a tight budget. While fibreglass roofs may save money over time due to lower maintenance and repair needs, the initial financial outlay can deter some from choosing this option.
Requires Professional Installation
For optimal performance and longevity, fitting a fibreglass roof should be done by experienced professionals. Improper installation can lead to issues such as inadequate sealing or weak bonding, resulting in leaks and costly repairs. It’s important to ensure that installers are familiar with the specific requirements of fibreglass roofing, as their expertise can significantly impact the roof’s durability and effectiveness.
Potential for UV Degradation
Over time, prolonged exposure to UV rays can cause the fibreglass material to yellow or degrade. Although many products come with UV protection, it’s still a concern that requires consideration. This degradation can affect not only the aesthetic appeal of the roof but also its performance, leading to potential leaks or other structural issues if not monitored and maintained properly.
Limited Flexibility in Design
Fibreglass roofing typically comes in specific sizes and shapes, which may limit design options compared to more versatile materials like traditional shingles or tiles. For homeowners looking for unique architectural features or custom designs, this limitation might be a significant drawback. While fibreglass can be molded to some extent, the options are not as extensive as those available with other roofing materials.
When considering fitting a fibreglass roof, weighing these disadvantages against its advantages is crucial to making an informed decision about your roofing needs. Understanding both sides of the equation will help you choose the best material for your specific requirements and long-term goals.
Fitting a Fibreglass Roof: GRP Flat Roof Installation Guide
Fitting a fibreglass roof, particularly a Glass Reinforced Plastic (GRP) flat roof, requires careful preparation and attention to detail. Here’s a step-by-step guide to ensure a successful installation:
Step 1: Preparing the Surface
- Check for Moisture: Begin by inspecting the existing roof surface for any signs of moisture. It’s crucial that the surface is completely dry before proceeding, as moisture can cause the fibreglass roof covering to adhere poorly and lead to future issues.
- Remove Debris: Clear away any debris, dirt, or loose materials from the roof. This ensures a clean working area and helps the fibreglass adhere properly.
Step 2: Selecting the Right Materials and Tools
- Fibreglass Mat: Choose an appropriate fibreglass mat, typically a chopped strand mat or woven roving, based on the specific requirements of your project.
- Resin: Select the right resin—Ortho resin for standard applications or Vinyl Ester resin for better chemical resistance. Be sure to have the correct catalyst (MEKP) to mix with the resin.
- Tools: Gather all necessary tools, including:
- Paint rollers for applying resin
- Squeegees for smoothing out materials
- Mixing buckets for resin
- Safety equipment such as gloves, goggles, and a respirator mask.
Step 3: Applying Layers Correctly
- Apply the First Layer: Begin by applying a coat of resin onto the prepared surface. Use a roller to ensure an even layer.
- Lay the Fibreglass Mat: Carefully place the fibreglass mat over the wet resin. Ensure it is laid flat with no air pockets. Use a squeegee to press the mat into the resin, ensuring complete saturation.
- Add Additional Layers: Depending on your project’s specifications, apply multiple layers of resin and fibreglass matting. Allow each layer to cure according to the manufacturer’s recommendations before applying the next.
Step 4: Finishing Touches
- Top Coat Application: Once all layers are in place, consider applying a gel coat for UV protection. This layer can help prolong the lifespan of the fibreglass roof by adding an extra barrier against environmental factors.
- Cleanup: After the installation, clean all tools and dispose of any waste material properly.
By following these steps, you can ensure a durable and long-lasting fibreglass roof. Proper installation is key to maximizing the benefits of fitting a fibreglass roof and ensuring it performs well over time.
Essential Benefits of Fibreglass Roof Profiles for Homes
Fitting a Fibreglass Roof: How Many Layers of Fibreglass on a Flat Roof
When fitting a fibreglass roof, determining the number of fibreglass layers to apply is essential for achieving optimal waterproofing and durability. Typically, a minimum of two to three layers of fibreglass is recommended to ensure a robust roofing system. Here’s a detailed breakdown of the considerations involved in the layering process:
Optimal Layering for Durability
First Layer: The initial layer serves as the foundational structure for the fibreglass roof. It is vital to ensure that this layer is thoroughly saturated with resin to create a strong bond with the substrate. This foundational layer not only enhances the roof’s strength but also contributes to its resilience against various environmental factors. Ensuring proper saturation is crucial as it lays the groundwork for subsequent layers.
Second Layer: The second layer is critical for reinforcing the roof’s durability. It is advisable to apply this layer while the first layer is still tacky and not fully cured. This technique allows the resin to create a seamless bond between the two layers, significantly minimizing the risk of leaks. This layer adds to the overall structural integrity, making the roof more capable of withstanding the elements.
Additional Layers: Depending on the specific application and environmental conditions, a third layer may be beneficial for enhanced protection. This is especially crucial in regions exposed to harsh weather conditions, such as high winds, heavy rain, or significant temperature fluctuations. Additional layers serve to increase the overall thickness and resistance of the roofing system, further safeguarding it against potential damage.
Considerations Based on Application
Environmental Conditions: The climate in which the roof is installed plays a significant role in determining the number of layers required. In areas that experience extreme weather conditions, such as heavy snowfall or strong winds, applying extra layers can provide greater protection. This added thickness helps to prevent leaks and structural issues that might arise from such adverse weather conditions.
Roof Usage: The intended use of the flat roof can also influence the necessary number of layers. If the roof is expected to support foot traffic, heavy equipment, or additional structures, a more robust layering system is advisable. This ensures the weight is adequately distributed across the fibreglass layers, providing added protection against wear and tear.
When fitting a fibreglass roof, incorporating two to three layers of fibreglass is essential for ensuring long-lasting performance and protection against the elements. Always consider the specific environmental conditions and application requirements to determine the optimal number of layers for your project. By carefully planning the layering process, you can achieve a durable and reliable fibreglass roofing solution.
Costs Associated with Fibreglass Roofing and Fitting a Fibreglass Roof
When considering fitting a fibreglass roof, understanding the associated costs is crucial for budgeting your project. The overall expenses can vary widely based on materials, labor, and other factors. Here’s a detailed overview of the costs involved in GRP (Glass Reinforced Plastic) roofing.
Overview of GRP Roofing Costs
- Material Prices: The cost of materials for fibreglass roofing includes fibreglass sheets, resin, and additional supplies like adhesive and trims. On average, the material costs for a fibreglass roof can range from $2.50 to $5.00 per square foot. Factors influencing these prices include the quality of the fibreglass, the type of resin used, and the thickness of the panels.
- Installation Expenses: Professional installation costs can significantly affect the total price. Installation typically ranges from $5.00 to $10.00 per square foot, depending on the complexity of the job and the expertise of the contractor. It’s essential to hire skilled professionals, as proper installation directly impacts the longevity and performance of the roof.
Comparison of Fibreglass Flat Roof Costs with Other Roofing Options
Here’s a comparison of fibreglass flat roof costs with other common roofing materials:
| Roofing Material | Material Cost (per sq ft) | Installation Cost (per sq ft) | Total Estimated Cost (per sq ft) |
|---|---|---|---|
| Fibreglass Composite | $2.50 - $5.00 | $5.00 - $10.00 | $7.50 - $15.00 |
| Asphalt Shingles | $1.50 - $3.00 | $2.50 - $5.00 | $4.00 - $8.00 |
| PVC Roofing | $3.00 - $6.00 | $4.00 - $8.00 | $7.00 - $14.00 |
| EPDM Rubber | $2.00 - $4.00 | $3.00 - $6.00 | $5.00 - $10.00 |
While fitting a fibreglass roof may come with higher initial material and installation costs compared to traditional options like asphalt shingles, its durability, low maintenance requirements, and long-term savings make it a worthwhile investment. Understanding these costs will help you make an informed decision when planning your roofing project. Always consider getting multiple quotes from contractors to find the best price and service for your needs.
Cement Rods Fiberglass for Durable Construction Solutions
Fitting a Fibreglass Roof with Fibreglass Roof Kits
When considering fitting a fibreglass roof, many homeowners and contractors turn to fibreglass roof kits as a convenient and effective solution. These kits simplify the process by providing all the necessary materials in one package, making them ideal for both DIY enthusiasts and professionals alike.
Description of Available Fibreglass Roof Kits
One popular option for fitting a fibreglass roof is the fibreglass roof kits available at retailers like Screwfix. These kits typically include:
- Fibreglass matting: Essential for creating a robust and waterproof surface.
- Resin: A key component that, when mixed with the matting, forms a strong bond.
- Catalysts: Necessary for curing the resin, ensuring a durable finish.
- Topcoat: Provides UV protection and enhances the aesthetic appeal of the roof.
- Application tools: Items such as rollers, brushes, and mixing containers may also be included to streamline the installation process.
Benefits of Using a Kit for DIY Projects
Using a fibreglass roof kit offers numerous advantages for those fitting a fibreglass roof on their own:
- Convenience: Kits come with everything you need, eliminating the hassle of sourcing materials separately.
- Cost-Effectiveness: Purchasing a kit can often be more economical than buying materials individually, as they are typically offered at a lower price when bundled.
- Ease of Use: Many kits are designed with user-friendly instructions, making it easier for DIYers to complete the project without professional assistance.
- Comprehensive Solution: These kits ensure that you have the right quantities of materials, reducing waste and ensuring that you complete the project without interruptions.
Fibreglass roof kits provide an excellent option for those looking to undertake roofing projects themselves, offering all the necessary components and instructions for successful installation. By choosing a kit, you can enjoy a streamlined process while achieving a durable and attractive fibreglass roof.
Key Considerations and Preparations for Fitting a Fibreglass Roof
Fitting a fibreglass roof requires thorough preparation and attention to detail to ensure a durable, leak-free, and long-lasting installation. Before laying a fibreglass roof, several important factors must be considered, including weather conditions, surface preparation, material selection, and safety measures. Proper planning and adherence to best practices will prevent common issues such as poor adhesion, cracking, or premature failure. Below are the critical aspects to focus on before installing a fibreglass roof.
Checking Weather Conditions
Since fibreglass roofing materials are applied in liquid form, weather conditions play a crucial role in ensuring a successful installation.
- Dry Weather is Essential – Rain or high humidity can interfere with resin curing, leading to weak adhesion and potential leaks.
- Temperature Considerations – The ideal temperature range for laying fibreglass is between 10°C and 25°C. If the temperature exceeds 35°C, the resin may cure too quickly, affecting the final finish.
- Wind Protection – Strong winds can cause dust and debris to settle on the wet resin, creating imperfections in the roof surface.
Preparing the Roof Deck
A strong, clean, and dry roof deck is fundamental to a successful fibreglass roofing installation.
- Use OSB3 Boards – Orientated Strand Board (OSB3) is the recommended substrate as it provides stability and compatibility with fibreglass resin.
- Ensure a Level Surface – The deck must be free from dips, raised edges, or gaps that could lead to weak spots in the fibreglass layer.
- Secure Fixings Properly – All boards should be firmly screwed down to prevent movement, which could cause cracks in the finished roof.
Selecting the Right Materials
Choosing high-quality materials is essential for ensuring the longevity and effectiveness of the fibreglass roof.
- Fibreglass Matting – Typically, a 450g or 600g chopped strand mat (CSM) is used, with 600g offering extra durability.
- Resin and Catalyst – Polyester resin, combined with a catalyst, ensures proper curing and bonding of the fibreglass layers.
- Topcoat Selection – A weather-resistant topcoat protects the fibreglass from UV rays, extending the lifespan of the roof.
Ensuring Proper Ventilation
Working with fibreglass involves strong fumes, making proper ventilation a necessary safety measure.
- Outdoor Application Preferred – If possible, apply fibreglass in open or well-ventilated areas to minimize exposure to fumes.
- Use Respiratory Protection – Wearing a suitable mask prevents inhalation of harmful vapors from the resin and topcoat.
- Avoid Confined Spaces – If working indoors, ensure adequate airflow by opening windows or using ventilation fans.
Gathering the Right Tools and Equipment
Having the correct tools on hand will make the installation process smoother and more efficient.
- Application Tools – A roller and brush are needed for applying resin and topcoat evenly.
- Mixing Equipment – Resin and catalyst must be mixed in precise proportions using measuring tools.
- Protective Gear – Gloves, safety goggles, and coveralls prevent skin contact with resin and other chemicals.
By paying attention to these essential factors before fitting a fibreglass roof, you can ensure a strong, weatherproof, and professional-quality installation that lasts for decades. Proper preparation and adherence to best practices will significantly reduce the risk of failures or costly repairs.
Key Considerations When Fitting a Fibreglass Roof
Fitting a fibreglass roof requires careful attention to detail at every stage of the installation process to ensure a durable, weatherproof, and long-lasting finish. A well-installed fibreglass roof can last for decades, but mistakes during installation can lead to cracks, leaks, or structural failure. Several factors must be considered, including preparation of the roof deck, proper application of materials, environmental conditions, and post-installation maintenance. Each of these aspects plays a crucial role in the success of the roofing project. Below, we will explore these key considerations in detail.
Preparing the Roof Deck
Before applying fibreglass, the roof deck must be properly prepared to ensure a strong bond between the materials. A poorly prepared surface can lead to adhesion issues and structural weaknesses.
- Use the Right Decking Material: The ideal substrate for a fibreglass roof is 18mm OSB3 (Oriented Strand Board), as it provides a stable and durable base. Plywood can also be used, but OSB3 is preferred for its resistance to moisture.
- Ensure a Clean and Dry Surface: The deck should be completely dry, free from dust, grease, or debris, as any contaminants can affect the adhesion of the fibreglass resin.
- Fix the Deck Securely: The boards should be firmly secured with screws at regular intervals (typically every 200mm) to prevent movement, which can cause cracking in the fibreglass layer over time.
Choosing the Right Weather Conditions
Weather plays a significant role in fibreglass roof installation, as temperature and humidity can impact the curing process of resin and topcoats.
- Avoid Rain and Moisture: Fibreglass roofing should never be installed in wet or damp conditions, as moisture can cause the resin to cure improperly, leading to weak spots and potential delamination.
- Ideal Temperature for Installation: The best temperature range for applying fibreglass resin is between 10°C and 20°C. If the temperature is too low, the resin will take too long to cure; if it is too high, it may set too quickly, making it difficult to work with.
- Wind Considerations: Strong winds can carry dust and debris onto the wet resin, causing imperfections. They can also make it challenging to lay the fibreglass mat evenly.
Proper Application of Fibreglass Materials
Applying fibreglass correctly is critical to achieving a smooth, durable, and waterproof finish. This includes laying the fibreglass mat, using the right amount of resin, and ensuring even coverage.
- Cut and Dry-Fit the Fibreglass Mat: Before applying resin, cut the fibreglass mat to size and position it on the deck to ensure proper fitting and alignment.
- Apply Resin Evenly: Use a roller to spread the resin evenly over the mat, making sure all areas are fully saturated. Avoid excessive resin application, as it can lead to brittle areas.
- Eliminate Air Bubbles: Air pockets trapped beneath the fibreglass can weaken the roof and cause leaks. Use a metal consolidating roller to press out air bubbles and ensure a smooth, strong bond.
Applying the Top Coat for Protection
The top coat serves as the final protective layer that shields the fibreglass from UV rays, weathering, and general wear and tear.
- Ensure the Fibreglass Layer is Fully Cured: Before applying the top coat, the fibreglass resin should be completely cured and hardened. This usually takes 6-8 hours but may vary depending on temperature.
- Choose the Right Top Coat: A high-quality polyester or gel coat is recommended for maximum durability. For enhanced protection, UV-resistant coatings can be used.
- Apply an Even, Consistent Layer: Use a roller to spread the top coat evenly across the surface, ensuring complete coverage. Avoid over-application, as an excessively thick coat may crack over time.
Addressing Expansion and Contraction
Fibreglass roofs can expand and contract with temperature changes, which may lead to stress fractures if not properly managed.
- Incorporate Expansion Joints: On larger roofs, adding expansion joints can help accommodate movement and reduce the risk of cracking.
- Allow Proper Curing Time: Rushing the curing process can result in a brittle finish that is more susceptible to temperature-induced stress.
Ensuring Proper Drainage and Flashing
Effective water drainage is essential to prevent pooling and leaks, ensuring the longevity of the fibreglass roof.
- Maintain Adequate Roof Pitch: A fibreglass roof should have at least a slight slope to allow water to drain effectively. While fibreglass roofs can be installed on flat surfaces, ensuring a minimal slope will improve drainage.
- Install Flashing Correctly: Properly sealed flashing around edges, vents, and other protrusions prevents water from seeping under the fibreglass layer. Use high-quality sealants and ensure tight-fitting joints.
Post-Installation Inspection and Maintenance
After installation, regular inspections and maintenance can help prolong the lifespan of a fibreglass roof.
- Inspect for Imperfections: Once the roof is fully cured, check for any defects, cracks, or areas with insufficient resin coverage.
- Clean the Roof Periodically: Dirt, debris, and standing water should be removed to prevent long-term damage. Avoid using harsh chemicals or abrasive tools that could damage the surface.
- Reapply Top Coat When Needed: Over time, the protective top coat may wear down. Reapplying it every 10-15 years will help maintain the roof’s integrity.
Fitting a fibreglass roof requires careful planning and attention to detail at every stage, from preparing the roof deck to applying the top coat and ensuring proper drainage. By following best practices, using high-quality materials, and considering environmental factors, you can achieve a strong, weather-resistant, and long-lasting fibreglass roof. Regular maintenance and inspections will further extend its lifespan, preventing costly repairs in the future.
Cleaning Tools and Equipment After Fitting a Fibreglass Roof
After fitting a fibreglass roof, cleaning the tools and equipment used during the installation process is crucial to maintain their functionality and extend their lifespan. Since fibreglass resin and topcoats are sticky and difficult to remove once cured, cleaning should be done promptly and correctly to avoid hardened residue on brushes, rollers, and other tools. Below are the key steps and considerations for cleaning fibreglass tools and equipment effectively, ensuring they are ready for future use and that no resin or contaminants are left behind.
Cleaning Brushes and Rollers
Brushes and rollers are essential for applying fibreglass resin and topcoat, but they can become difficult to clean once the resin begins to set.
- Prompt Cleaning is Key – As soon as the work is done, clean the brushes and rollers immediately to prevent resin from hardening on the surface.
- Solvents and Thinners – Use acetone or fibreglass resin thinner to dissolve and remove the resin. Submerge the brushes and rollers in the solvent for a few minutes, then scrub them gently to remove any excess material.
- Rinsing and Drying – After cleaning, rinse the tools with warm water and let them air dry completely before storing.
Cleaning Mixing Buckets and Containers
Mixing buckets are often left with residual resin and catalyst, which can harden if not cleaned properly.
- Avoid Letting Resin Set – Scrape out as much of the leftover resin as possible while it’s still wet.
- Use Solvents for Cleaning – Acetone or specialized cleaning products for fibreglass are effective in dissolving any leftover resin in the bucket. Pour the solvent into the bucket, swirl it around, and then wipe it down with a cloth.
- Rinse Thoroughly – After cleaning, rinse the bucket with warm water to remove any solvent traces and dry it completely.
Cleaning Protective Gear
Protective gear such as gloves, goggles, and coveralls may also become contaminated with fibreglass resin during installation.
- Gloves – If using disposable gloves, remove and discard them carefully. For reusable gloves, wipe them down with a cloth soaked in acetone to remove resin, then wash with soap and water.
- Goggles – Use a cloth or sponge soaked in acetone to wipe resin off goggles, making sure to clean both the inside and outside.
- Coveralls – If coveralls are reusable, check for resin spots and gently wipe them with a solvent or acetone. For stubborn stains, you may need to launder them.
Cleaning Roller Frames and Other Tools
Roller frames, brushes, and other application tools should be thoroughly cleaned to ensure they function properly during future use.
- Scraping Off Excess Resin – Before using solvents, scrape off any large amounts of dried resin with a plastic scraper to avoid clogging the tools.
- Use a Small Brush – After using a solvent to clean larger surfaces, use a small wire brush to get into crevices or the metal parts of the tools to remove any leftover resin.
- Inspect for Residue – After cleaning, inspect all tools to ensure no resin remains, as even small amounts can interfere with future applications.
Disposal of Contaminated Materials
It’s essential to dispose of any fibreglass waste, solvents, and contaminated materials responsibly to avoid environmental damage.
- Proper Disposal of Waste – Dispose of any resin-soaked cloths, wipes, or other contaminated materials according to local waste disposal regulations. Many areas have special facilities for the disposal of chemical waste and fibreglass materials.
- Recycling Solvents – Some solvents, like acetone, can be recycled after use. Be sure to check with your local recycling facility to ensure proper disposal.
Cleaning tools and equipment after fitting a fibreglass roof is an important step that helps maintain the longevity of your tools and ensures future roofing projects run smoothly. Prompt cleaning and proper disposal are essential for both the effectiveness of your equipment and the environment.
Service Life and Key Factors Affecting the Longevity of a Fibreglass Roof
Fitting a fibreglass roof is a long-term investment, known for its durability and resilience. On average, a well-installed fibreglass roof can last between 20 to 40 years, depending on various influencing factors. While fibreglass is highly resistant to weathering, impact, and moisture, its longevity is not guaranteed without proper installation, maintenance, and environmental considerations. Several aspects affect how long a fibreglass roof will last, including the quality of materials, environmental exposure, maintenance practices, and the way the roof was installed. Below, we will explore these key factors in detail.
Quality of Materials Used
The lifespan of a fibreglass roof is heavily influenced by the quality of materials used during installation. High-quality components ensure better durability and resistance against environmental factors.
- Resin and Fibreglass Mat: Using premium-grade polyester resin and fibreglass mat ensures a strong and long-lasting roofing system. Inferior materials may degrade faster, leading to cracks and leaks.
- Top Coat Protection: The top coat is crucial for shielding the fibreglass from UV rays, moisture, and chemical exposure. A high-quality top coat can extend the roof’s life significantly.
- Sealants and Flashing: Properly applied, high-quality sealants and flashing prevent water ingress, reducing the likelihood of structural damage over time.
Proper Installation Techniques
The way a fibreglass roof is fitted plays a critical role in its overall lifespan. Even the best materials will fail if not installed correctly.
- Even Application of Resin: The resin must be applied evenly across the fibreglass mat to avoid weak spots that can lead to premature wear and tear.
- Correct Layering and Curing: Each layer of fibreglass must be properly laminated and fully cured before adding subsequent layers. Insufficient curing can weaken the structure.
- Eliminating Air Bubbles: Air pockets trapped in the fibreglass can create vulnerabilities, making the roof more susceptible to cracking and moisture infiltration.
Environmental and Weather Conditions
The climate and exposure to external elements have a direct impact on the service life of a fibreglass roof.
- UV Exposure: Continuous exposure to direct sunlight can cause degradation over time. Applying a UV-resistant top coat can help mitigate damage.
- Temperature Fluctuations: Extreme temperature changes can cause expansion and contraction, which may lead to stress fractures if the roof is not designed to accommodate movement.
- Heavy Rain and Snow: Accumulated water or snow can exert pressure on the roof, potentially leading to structural damage if drainage is inadequate.
Regular Maintenance and Upkeep
Routine maintenance is essential for ensuring the long-term durability of a fibreglass roof. A well-maintained roof will always last longer than a neglected one.
- Cleaning the Surface: Dirt, algae, and debris should be removed periodically to prevent surface degradation. Use mild detergents and avoid abrasive tools.
- Inspecting for Damage: Regular checks for cracks, blisters, or loose edges can help identify minor issues before they become major problems.
- Reapplying Top Coat: Over time, the protective top coat may wear away. Reapplying it every 10-15 years can significantly extend the roof’s lifespan.
Structural Stability and Roof Design
The structural integrity of the building and the way the roof is designed also contribute to how long a fibreglass roof will last.
- Proper Drainage System: Ensuring that the roof has an effective drainage system prevents water pooling, which can lead to premature damage.
- Support and Reinforcement: A well-supported roof deck prevents unnecessary flexing and movement that could weaken the fibreglass over time.
- Avoiding Heavy Loads: Excessive weight from equipment, foot traffic, or accumulated snow can stress the fibreglass surface, reducing its lifespan.
Potential Repairs and Longevity
Even with high-quality installation, occasional repairs may be necessary to maintain the integrity of a fibreglass roof.
- Minor Cracks and Scratches: Small surface cracks can be repaired with resin and a fresh top coat, preventing them from spreading.
- Delamination Issues: If the fibreglass layer separates from the substrate, it should be repaired immediately to prevent further damage.
- Sealing Leaks: Any detected leaks should be sealed promptly with a compatible fibreglass patch to prevent moisture infiltration.
Fitting a fibreglass roof provides a durable and long-lasting solution, typically offering a service life of 20 to 40 years. However, its lifespan depends on various factors, including material quality, installation techniques, environmental exposure, maintenance, and structural stability. By using high-quality materials, following best installation practices, and ensuring regular inspections and maintenance, homeowners can maximize the longevity of their fibreglass roofs. Taking proactive measures against weathering, UV damage, and physical wear will help prevent premature deterioration, ensuring a strong and reliable roof for decades to come.
Maintaining a Fibreglass Roof After Fitting a Fibreglass Roof
After fitting a fibreglass roof, proper maintenance is essential to ensure its longevity, appearance, and functionality. Fibreglass roofs are known for their durability and low maintenance, but regular care can extend their lifespan even further. Maintenance involves checking for damage, cleaning the roof surface, addressing wear and tear, and ensuring proper drainage. In this guide, we explore key maintenance steps for keeping your fibreglass roof in excellent condition after installation, from routine inspections to handling repairs.
Routine Inspections
Regular inspections of your fibreglass roof are necessary to identify any potential issues early on. Performing these checks helps prevent major problems, such as leaks or structural damage, from developing.
- Visual Inspection – Inspect the roof surface for cracks, chips, or signs of wear. Pay special attention to areas around seams and edges, as these are more vulnerable to damage.
- Check for Leaks – After heavy rain, check the interior of the building for water stains or damp spots, which could indicate leaks in the fibreglass roof.
- Examine the Topcoat – Ensure the topcoat is intact and not showing signs of UV degradation, such as fading or cracking.
Cleaning the Roof Surface
Keeping the fibreglass surface clean helps maintain its appearance and functionality. Regular cleaning removes dirt, moss, and debris that could affect the roof’s integrity or appearance.
- Remove Debris – Sweep away leaves, twigs, and other debris that can accumulate on the roof. Blocked gutters and debris buildup can cause water to pool, potentially leading to damage.
- Use Mild Cleaners – Clean the roof with a mild detergent or fibreglass cleaner, avoiding harsh chemicals that could damage the surface. For stubborn stains, a soft-bristle brush can help.
- Avoid Harsh Scrubbing – Be gentle when cleaning to prevent damaging the topcoat.
Ensuring Proper Drainage
Proper drainage is vital to the health of your fibreglass roof. Poor drainage can lead to water pooling, which could cause the roof to weaken over time.
- Clear Gutters and Drains – Regularly check gutters, downpipes, and drains to ensure they are clear of debris. Blocked drains can cause water to accumulate on the roof, increasing the risk of leaks.
- Inspect the Slope – Make sure the roof has an adequate slope to allow water to run off. Over time, slight shifts in the roof’s pitch may occur, which could affect drainage.
Repairing Minor Damage
Fibreglass roofs are highly durable, but they can still suffer minor damage due to impact or wear. Addressing small issues early can prevent more significant problems in the future.
- Fix Cracks and Chips – If you notice any cracks or chips in the fibreglass, they should be repaired immediately. Small damages can be filled with resin and patched using fibreglass matting.
- Reapply Topcoat – If the topcoat shows signs of wear, such as cracking or fading, it should be reapplied to restore UV protection and water resistance.
- Patch Leaks – If you detect a leak, inspect the area for cracks or gaps and repair them with a resin-based fibreglass patch.
Protecting the Roof from UV Damage
UV rays can gradually degrade the topcoat and the fibreglass material itself, leading to weakening over time. To prolong the roof’s life, taking steps to protect it from UV damage is essential.
- Reapply UV-Resistant Topcoat – The topcoat acts as a shield against UV rays. Over time, it can wear away, so reapplying the topcoat every 5-7 years is recommended.
- Use Reflective Coatings – Some fibreglass roofs can benefit from reflective coatings that reduce UV exposure and lower the heat absorbed by the roof.
Addressing Moss and Algae Growth
Moss, algae, and lichen can sometimes grow on fibreglass roofs, especially in damp or shaded areas. This growth not only detracts from the roof’s appearance but could also lead to damage if left untreated.
- Use a Moss Killer – Apply a moss and algae remover to areas where growth is evident. These products are designed to kill and prevent further growth without damaging the roof surface.
- Clean Regularly – In areas prone to moss, algae, or lichen, regular cleaning is necessary to prevent long-term buildup.
By following these essential maintenance steps, you can keep your fibreglass roof in top condition for many years after installation. Routine inspections, cleaning, and prompt repairs will help prevent problems and ensure your roof continues to perform effectively and look great. Proper maintenance is the key to maximizing the lifespan and durability of your fibreglass roof.
FAQs about Fitting A Fibreglass Roof
Fiberglassing a roof involves several steps to ensure a durable, waterproof finish. First, prepare the roof surface by cleaning it thoroughly to remove any debris and dirt. Next, check for moisture, as a dry surface is crucial for proper adhesion. Once the surface is prepped, lay down OSB3 boards to provide a stable base. After securing the boards, cut the fiberglass mat to size and mix the resin according to the manufacturer’s instructions, adding the appropriate catalyst. Apply the resin to the boards, then lay the fiberglass mat over it, saturating it with more resin. Finally, allow the roof to cure properly and apply a topcoat for added protection against UV rays.
Yes, incorporating expansion joints in a fiberglass roof is essential, especially in larger installations. Fiberglass is prone to expansion and contraction due to temperature fluctuations. Without expansion joints, the material may buckle or crack, leading to leaks and structural issues. Properly placed expansion joints help accommodate these movements, ensuring the roof maintains its integrity over time. It’s advisable to consult a roofing professional to determine the best placement and design of expansion joints based on the specific project requirements.
The minimum pitch for a fiberglass roof typically ranges from 1:40 to 1:60, equating to approximately 1.5 to 2 degrees. This slight slope allows for adequate water drainage, reducing the risk of pooling, which can lead to leaks or damage. However, specific requirements may vary based on local building codes and environmental conditions. It’s important to consult with a professional to ensure that the roof pitch meets all necessary guidelines and functions effectively for your climate.
Generally, applying two to three top coats is recommended for a fiberglass roof. The first coat provides a protective layer, while subsequent coats enhance durability and weather resistance. The number of coats can depend on the intended use and environmental conditions. For instance, areas exposed to harsh weather might benefit from additional layers for enhanced protection. Applying the top coats evenly and allowing adequate curing time between applications is crucial for optimal results. Always follow the manufacturer’s guidelines for the specific products you are using to achieve the best outcome.
A standard fibreglass roof typically requires one layer of fibreglass matting, which is reinforced with resin and then covered with a durable topcoat. However, in areas that experience heavy foot traffic or extreme weather conditions, applying a second layer may be beneficial to enhance strength and longevity. The thickness of the fibreglass layer can vary, with a 450g or 600g chopped strand mat (CSM) commonly used for roofing applications. A single 600g layer is generally sufficient for most domestic projects, while two layers of 450g may be used for additional reinforcement. Applying multiple layers increases durability but also adds weight and cost. It is crucial to ensure each layer is fully saturated with resin and properly consolidated to avoid weak spots or delamination. If extra strength is needed, reinforcement strips can be applied at stress points before the main fibreglass layer is installed.
Yes, you can recoat a fibreglass roof, but proper preparation is essential to ensure good adhesion and longevity. Over time, the topcoat of a fibreglass roof may wear down due to exposure to UV rays and weather conditions, leading to cracks, chalking, or minor surface degradation. Before recoating, the surface must be cleaned thoroughly and lightly sanded to remove any contaminants and provide a key for the new topcoat. If there are any cracks or damaged areas, they should be repaired with fresh resin and fibreglass matting before applying the new coat. A high-quality fibreglass roofing topcoat should be used to restore waterproofing and UV resistance. Proper curing times must be observed to ensure a durable finish. Recoating is an effective way to extend the life of a fibreglass roof without needing a full replacement, provided the structural integrity of the existing roof is intact.
Yes, fibreglass can be applied over an existing fibreglass roof, but the surface must be properly prepared to ensure strong adhesion. The old topcoat should be thoroughly cleaned, abraded with sandpaper, and degreased to remove any contaminants or loose material. If the existing fibreglass layer is cracked or delaminated, these areas must be repaired before applying a new layer. In some cases, a primer may be needed to promote better adhesion between the old and new layers. Applying fresh fibreglass over an existing roof can reinforce its structure and extend its lifespan, but it is essential to ensure that the existing surface is dry, sound, and free from any major structural damage. If the old fibreglass is in poor condition, a complete removal and reinstallation may be the better option to prevent ongoing issues.
Fibreglass should not be applied directly over a topcoat unless the surface has been adequately prepared. Topcoats, also known as gelcoats, create a smooth, sealed finish that prevents proper bonding of new fibreglass layers. To ensure adhesion, the topcoat must be sanded down until the underlying fibreglass is exposed, removing the glossy finish. The surface should then be cleaned with acetone or a suitable degreaser before applying a new fibreglass layer. If the topcoat is left untreated, the new fibreglass may delaminate or fail to bond properly, leading to structural weaknesses. In cases where a complete re-lamination is required, the best approach is to remove the old topcoat completely before applying fresh fibreglass and resin.
No, laying a fibreglass roof in the rain is not recommended. Fibreglass resin requires a dry and warm environment to cure correctly, and moisture can prevent proper adhesion, leading to poor bonding and potential failure of the roofing system. Rain can also cause contamination of the resin, resulting in an uneven or sticky finish. Even high humidity can affect curing times and overall durability. If rain is expected, it is best to postpone the work or use temporary coverings to protect the surface. Ideally, fibreglass roofing should be installed in dry weather with temperatures above 10°C (50°F) to ensure proper curing and a smooth, durable finish. If working in unpredictable weather conditions, a gazebo or temporary shelter can help protect the roofing materials while work is being carried out.
Yes, EPDM (ethylene propylene diene monomer) can be laid over a fibreglass roof, but the surface must be properly prepared to ensure strong adhesion. Fibreglass is a rigid material, whereas EPDM is a flexible rubber membrane, so any cracks, sharp edges, or uneven areas on the fibreglass should be repaired and smoothed out first. The fibreglass surface should be thoroughly cleaned and lightly abraded to remove any gloss from the topcoat, allowing the EPDM adhesive to bond effectively. A suitable primer or adhesive must be used to ensure a strong and lasting bond. EPDM can provide additional waterproofing and flexibility over an aging fibreglass roof, but it is important to assess whether a full roof replacement would be a more viable long-term solution. If the fibreglass structure is failing, covering it with EPDM may only provide a temporary fix.
Yes, you can walk on a fibreglass roof, but its strength depends on the thickness of the fibreglass layer and whether additional reinforcement has been used. A standard fibreglass roof with a single 450g or 600g mat is generally strong enough for occasional foot traffic, but if the roof is regularly accessed, a thicker fibreglass layer or additional support such as OSB boarding underneath may be required. It is advisable to walk carefully and distribute weight evenly to avoid causing stress points that could lead to cracks. Using walkway pads or installing non-slip coatings can help protect the surface from damage. If a fibreglass roof is not properly supported underneath, excessive foot traffic could lead to delamination or structural weakening over time.
Yes, fibreglass expands and contracts, but significantly less than other roofing materials like metal or plastic. Temperature fluctuations cause fibreglass to slightly expand in hot weather and contract in cold conditions, but this movement is relatively minor due to its rigid structure. However, repeated cycles of expansion and contraction can eventually lead to hairline cracks or stress points, especially if the roof was not installed correctly or lacks sufficient resin saturation. To minimize expansion-related issues, fibreglass roofing should be installed with proper curing and reinforcement. Using a high-quality topcoat and ensuring adequate bonding between layers can help improve resistance to temperature changes. In extreme climates, additional flexible expansion joints may be used in large fibreglass installations to accommodate movement and prevent cracking.
When applying a fibreglass roof, it’s important to allow the fibreglass resin to cure before applying the top coat. Typically, you should wait about 6 to 8 hours after the fibreglass mat has been applied and the resin has fully saturated it. However, this can vary depending on weather conditions, especially temperature and humidity, which can affect the curing time. In cooler conditions, you may need to wait up to 12 hours. Ensure the fibreglass is fully cured and hard to the touch before proceeding with the top coat to ensure a proper bond and finish. It’s also important to clean the surface of any dust, dirt, or debris before applying the top coat, as these can affect adhesion. Always follow the manufacturer’s instructions for specific curing times for the materials you are using.
When installing fibreglass shingles on a sloped roof, a solid, waterproof underlayment is crucial for ensuring long-lasting protection. Typically, 15lb roofing felt is used as the base layer. On most roofs, one layer of 15lb felt is sufficient for fibreglass shingles. However, on steeper or more exposed roof sections, some installers might choose to add a second layer for additional security against water penetration. This is especially true in areas with heavy rain or wind. The felt acts as a secondary waterproofing barrier in case of any gaps in the shingles. It’s also essential to overlap the felt by several inches to ensure no seams are exposed, preventing water from getting beneath the shingles. Always check the specific installation guidelines of the shingle manufacturer for the recommended underlayment specifications.
A properly installed fibreglass roof can last anywhere between 20 to 40 years, depending on factors like the quality of the materials, installation, and the roof’s exposure to weather conditions. Fibreglass is known for its durability, resistance to UV rays, and ability to withstand harsh elements. Over time, the roof’s lifespan may be affected by environmental conditions such as extreme temperatures, heavy rainfall, and exposure to chemicals or tree debris. Regular maintenance, such as cleaning the roof and inspecting for cracks or damage, can help extend its lifespan. Additionally, applying a top coat every 10-15 years can help preserve the roof and prevent degradation of the fibreglass layers. Always check for signs of wear or damage and address them promptly to ensure the roof remains effective for the longest time possible.
The cost of installing a fibreglass roof can vary based on factors such as roof size, the complexity of the installation, and your location. On average, the cost of fibreglass roofing can range from £50 to £90 per square meter, including both materials and labor. Smaller roofs might cost more per square meter due to setup costs, while larger projects might benefit from bulk pricing. For a standard, single-storey residential roof, the total cost could range from £3,000 to £6,000, depending on the roof’s size. If you’re opting for high-quality materials or a specialist installation, this cost could increase. It’s also important to consider additional expenses such as underlayment, top coats, and finishing materials. Always request quotes from multiple professionals to ensure you’re getting the best value for your roof installation project.
After the fibreglass has been applied to the roof, it’s essential to apply a protective top coat. Typically, fibreglass roofs are coated with a polyester resin or a gel coat, which acts as a barrier to UV rays, moisture, and environmental contaminants. This layer helps maintain the fibreglass’s durability and appearance while preventing cracking, peeling, or degradation over time. Some fibreglass roofs are also coated with UV-resistant acrylic, polyurethane, or silicone coatings. These coatings not only protect the surface but can also enhance the roof’s performance by making it more reflective, thus improving energy efficiency. Depending on the environmental conditions, the top coat may need to be reapplied every 10 to 15 years to maintain its protective qualities. Regular maintenance is essential for ensuring your fibreglass roof remains in good condition.
The average cost of a fibreglass roof installation typically ranges between £3,000 and £6,000 for an average-sized residential home. This is based on a roof size of around 40-60 square meters and includes both materials and installation. The price will vary depending on the quality of the materials, roof complexity, and your geographic location. For example, roofs with more intricate designs or those that require extra preparation work can increase the overall cost. The cost of the fibreglass materials themselves can also vary, with premium options, such as UV-resistant finishes or gel coats, costing more. Keep in mind that additional costs such as underlayment, accessories (like flashing), and finishing materials (like top coats) can contribute to the total price. For a precise estimate, always consult with a professional roofing contractor for an on-site assessment.
For fibreglass shingles, the minimum slope required for proper installation is typically around 4:12, or 18.43 degrees. This means for every 12 horizontal inches of roof, the roof rises 4 inches vertically. At this angle, water is likely to drain off the shingles properly, preventing water from pooling and causing damage to the roof. If the slope is lower than 4:12, additional waterproofing measures or underlayment may be required to ensure proper water runoff. While fibreglass shingles can be installed on roofs with steeper slopes (up to 12:12 or 45 degrees), they also work well on lower-pitched roofs, but installation must be carefully done to avoid water infiltration. Always consult with the manufacturer’s specifications to ensure that the chosen slope meets their installation guidelines for maximum effectiveness.
Fibreglass roofs can crack for several reasons. One of the most common causes is improper installation, where the resin or fibreglass mat wasn’t applied correctly, leading to weakened areas that are more prone to cracking. Over time, UV rays from the sun can break down the material, causing it to become brittle and prone to cracking. Extreme weather conditions, such as heavy hail or freezing temperatures, can also put stress on the fibreglass, leading to cracks. Additionally, if there’s movement in the building or underlying structure, this can cause the fibreglass to flex and crack. It’s essential to maintain the roof by cleaning it regularly and applying topcoats to protect it from UV damage. If cracks appear, they should be repaired promptly to prevent water infiltration and further damage to the roof.
A banging sound coming from a fibreglass roof can be caused by a number of factors. One common reason is thermal expansion and contraction. As the temperature changes throughout the day, the fibreglass material expands when it heats up and contracts as it cools down. This movement can create popping or banging sounds as the roof adjusts. Another possibility is the underlying roof structure shifting or settling, which can also create noises. If the fibreglass is not properly fastened or adhered to the structure, it may flex under stress, causing noise. In some cases, debris or tree branches may get caught on the roof surface, causing friction that leads to banging sounds. If the noise persists or worsens, it’s a good idea to inspect the roof to ensure there are no loose materials or structural issues causing the disturbance.

As the editor of GangLong Fiberglass, I have years of experience and in-depth research, focusing on cable tray products, fiberglass solutions, and grille systems. I incorporate years of industry insights and practical experience into every content, committed to promoting the progress of the industry. At GangLong Fiberglass, my commitment is reflected in every product, from innovative cable trays to durable fiberglass solutions and sturdy grille systems. As an authoritative voice in the industry, my goal is to provide valuable information to professionals and businesses and promote forward-looking solutions.